Install Your Own Mini Split AC and Save Big
Install Your Own Mini Split AC and Save Big

Why Ductless AC Installation is the Smart Choice for Texas Homeowners
Ductless AC installation offers Texas property owners a cost-effective way to add efficient cooling and heating to their homes without expensive ductwork. Installing a mini-split system yourself can save thousands in labor costs while providing superior energy efficiency and zoned climate control.
Quick Answer: Ductless AC Installation Process
- Plan your system: Calculate BTUs needed, choose location, check electrical requirements
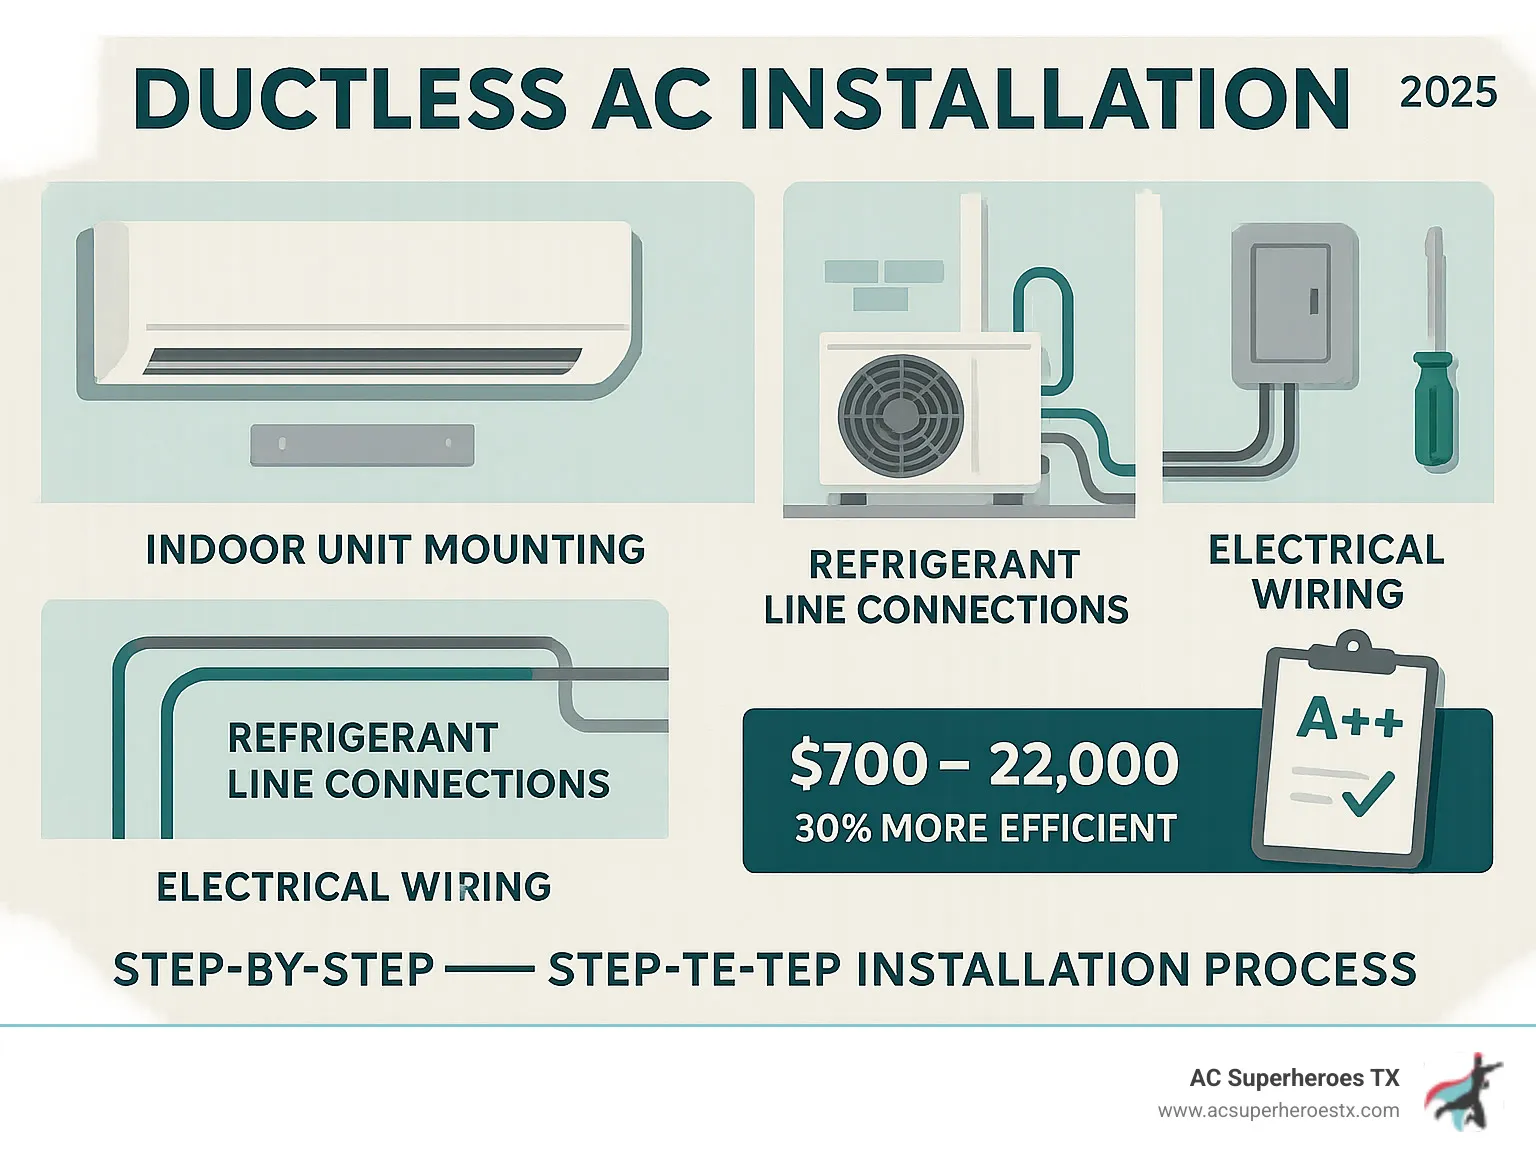
- Install indoor unit: Mount bracket, drill line set hole, hang air handler
- Mount outdoor condenser: Place on pad or bracket with proper clearance
- Connect components: Run refrigerant lines, electrical wiring, and drain lines
- Test and commission: Check for leaks, power up system, verify operation
Most DIY mini-split systems cost between $700-$2,000 compared to professional installations ranging $2,000-$10,500. These ductless systems are 30% more efficient than traditional central air because they eliminate energy losses from leaky ducts.
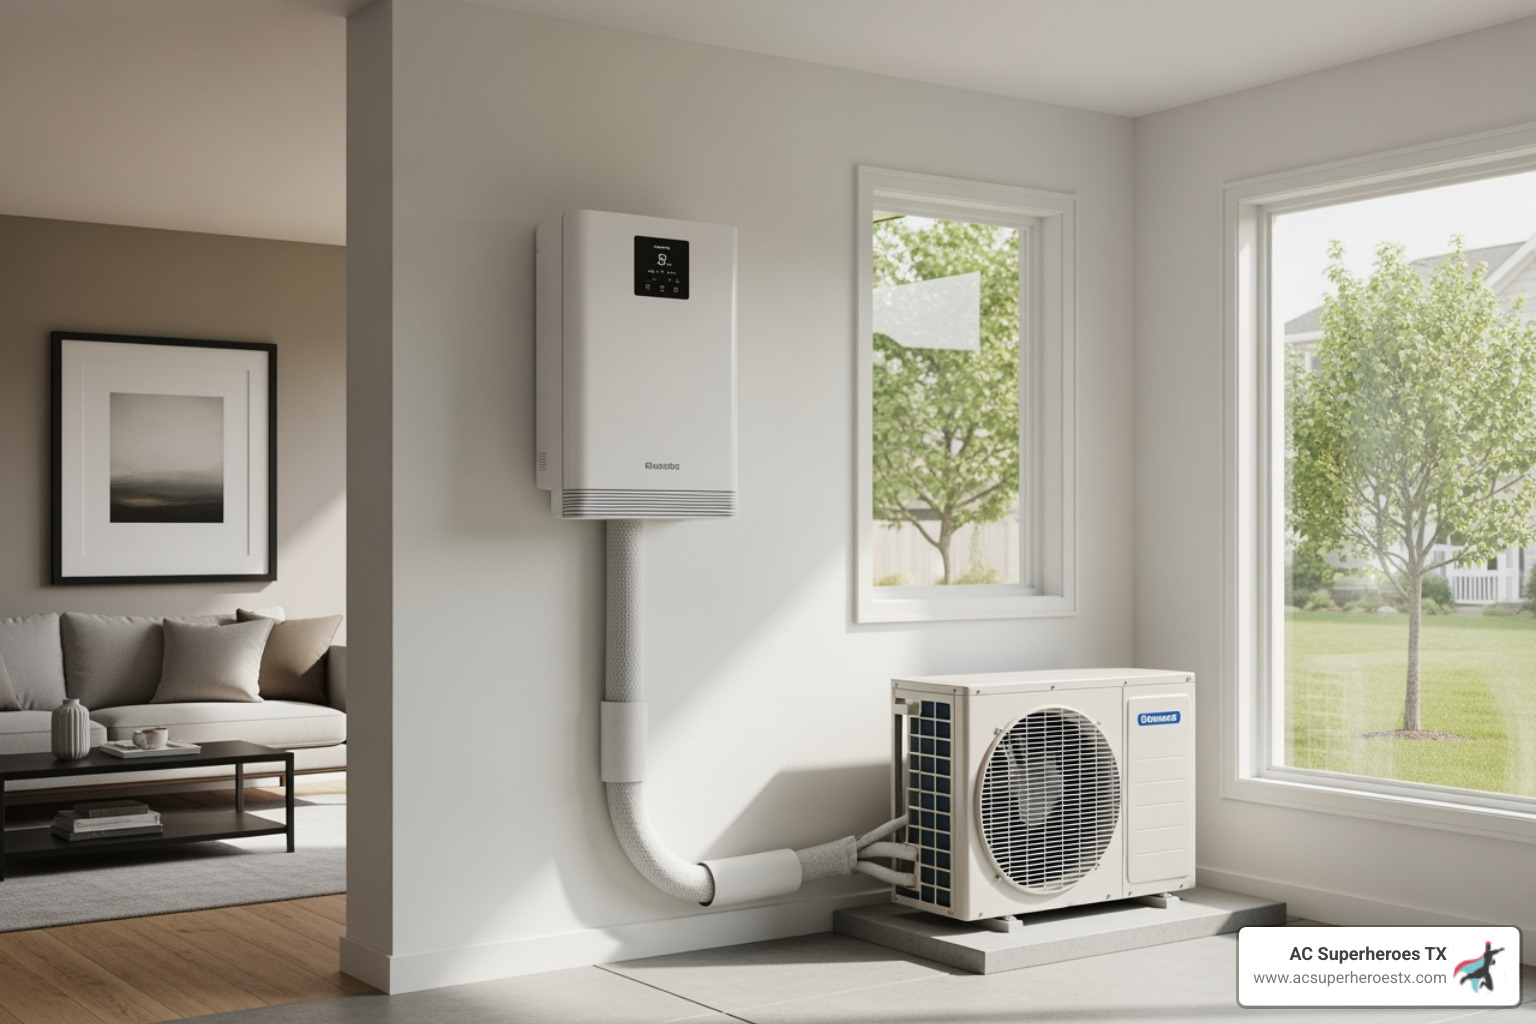
Mini-split systems work by using an outdoor condenser connected to one or more indoor air handlers through refrigerant lines. The outdoor unit compresses refrigerant and sends it indoors, where it absorbs heat from your space. This process reverses for heating, making these units effective year-round climate solutions.
The key advantage? No ductwork required. This makes mini-splits perfect for home additions, older homes without existing ducts, or spaces where extending ductwork isn't practical.
Modern DIY-friendly systems come with pre-charged refrigerant lines and quick-connect fittings. This means you can complete most of the installation without special tools or EPA certification - though electrical connections may still require professional help.
Planning Your Mini-Split Project: What to Know Before You Start
Proper planning is crucial for a successful ductless AC installation. Taking the time to plan now will prevent headaches and extra trips to the hardware store later. A mini-split system has three main components working together to keep you cool.
The indoor air handler is the sleek, quiet unit mounted on your wall or ceiling that delivers cool air directly into the room. The outdoor condenser sits outside your home, compressing refrigerant and moving heat to cool your space. Connecting them is the line set, a bundle containing refrigerant lines, a drain line for moisture, and electrical wiring.
You have two main options. Single-zone systems pair one indoor unit with one outdoor unit, perfect for a single room or home office. Multi-zone systems connect up to eight indoor units to one outdoor condenser, allowing each zone to have its own thermostat.
For Texans, energy efficiency ratings are key to lower electric bills. SEER2 ratings measure seasonal cooling efficiency; higher numbers mean more savings. Some mini-splits reach 35 SEER, far exceeding the 26 SEER of many central air systems. EER2 ratings measure performance on hot days, while HSPF2 ratings measure heating efficiency for heat pump models.
For more ways to keep your cooling costs down, check out our guide on Top 5 Energy Efficient Cooling Solutions for Austin Homes.
Your outdoor unit typically needs a dedicated 220-volt, 20-amp circuit running from your main panel to a disconnect box. If you're uncomfortable with electrical work, this is a job for a licensed electrician. Position the indoor unit for effective air distribution and the outdoor unit with proper clearance for airflow and maintenance.
Selecting the Right Tools and Materials
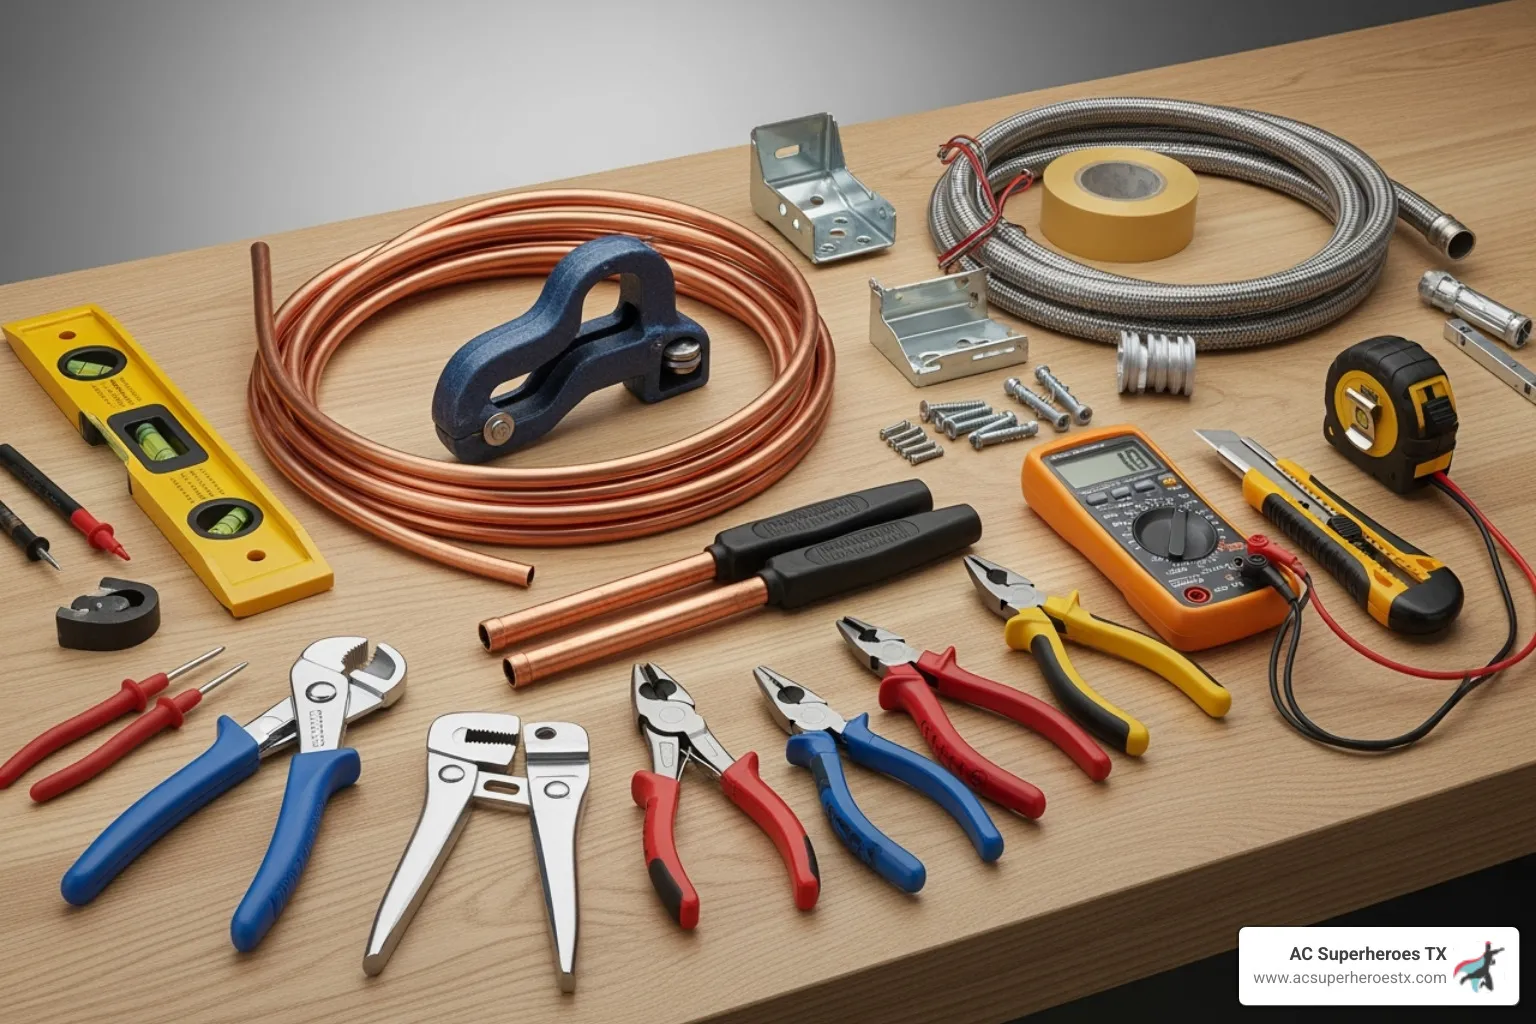
Having the right tools is essential. You'll need a drill with a hole saw (2-3 inches) for the line set. A level is critical for mounting the indoor unit correctly to ensure proper drainage. A stud finder helps locate solid mounting points while avoiding wires and pipes. A torque wrench is necessary to tighten refrigerant connections to prevent leaks without damaging fittings. Also gather a screwdriver set, adjustable wrenches, a condenser pad or wall bracket, and a line set cover kit to protect exterior lines.
Sizing Your System Correctly
Correctly sizing your system is vital. An oversized unit will short-cycle without properly dehumidifying, while an undersized unit will run constantly without cooling effectively. Start by calculating your room's square footage and multiplying by about 20 BTUs per square foot (e.g., a 600-square-foot space needs about 12,000 BTUs).
However, you must also account for climate considerations like intense Texas heat, insulation quality, and window placement (especially south-facing windows). Factor in ceiling height, occupancy, and heat-generating appliances. The manufacturer's sizing charts in the installation manual are your best resource for accurate BTU requirements.
If you're noticing issues with your current cooling system, you might want to read about Signs of Poor Airflow in AC System to understand what proper system performance should look like.
The Complete Step-by-Step Ductless AC Installation Guide
This is where your planning becomes a working cooling system. While DIY-friendly units simplify the process, precision and safety are key.
Safety is paramount. Always shut off power at the breaker before working with electricity. Use a sturdy ladder and a helper, especially when lifting heavy units. Above all, follow the manufacturer's instructions precisely to avoid voiding your warranty or causing damage.
Step 1: Install the Indoor Air Handler
Install the mounting bracket securely on wall studs using a stud finder. If studs aren't available, use heavy-duty hollow wall anchors rated for the unit's weight. The bracket must be perfectly level to ensure proper condensate drainage.
To drill the line set hole, pick a spot on an exterior wall away from direct sunlight and doorways. Drill a pilot hole from inside to outside to check for obstructions. Once clear, use your hole saw to create the full-size opening (typically 2-3 inches). For proper drainage, angle the hole slightly downward toward the outside (about 1/4 inch per foot).
Carefully feed the pre-charged line set and drain hose bundle through the hole from inside to outside. Keep the condensate line at the bottom of the bundle to let gravity assist with drainage.
To hang the indoor unit, first connect the electrical communication wire to the unit's terminals per the manual. With a helper, lift the unit and hook it onto the mounting bracket, pushing gently until it clicks securely into place.
Step 2: Mount the Outdoor Condenser Unit
Prepare the condenser pad to give your outdoor unit a stable foundation. A pre-fabricated plastic pad is the easiest option. Wall brackets are also a great choice, especially in flood-prone areas.
Ensure proper clearance by placing the unit with adequate space from walls and bushes for airflow and maintenance. Placing it on the north or east side of your home can protect it from the harshest afternoon sun. To reduce vibration, secure the unit firmly to its pad or bracket.
Route the line set from the wall hole to the outdoor unit, keeping it neat. Connect the refrigerant lines to the corresponding ports on the outdoor unit. For professional installations in the Austin area, you can learn more about Ductless AC Installation in Austin, TX.
Step 3: Final Connections and System Checks for your ductless AC installation
This final phase brings everything together.
Connecting refrigerant lines on pre-charged systems often involves quick-connect fittings. For systems requiring flaring, create perfect flare connections and secure them with flare nuts. Use your torque wrench to tighten fittings to the manufacturer's specification (e.g., 11.8 ft/lbs for 1/4" tubing, 19 ft/lbs for 3/8" tubing) to prevent leaks.
For electrical wiring, follow the diagram exactly, connecting power supply wires to the outdoor unit and linking communication wires between units. Double-check all connections. The disconnect box is a required safety device that lets you cut power to the unit for maintenance.
Leak testing is crucial for system longevity. While professionals use nitrogen and vacuum pumps (to 500 microns per EPA 608 guidelines), even DIYers should ensure all connections are tight. A standing vacuum test confirms the system is sealed.
Cover the line set with a protective kit to shield it from weather and UV damage and give the installation a finished look.
To power on the system, double-check all connections, ensure the disconnect switch is off, then turn on the breaker. Finally, switch on the disconnect box and start your new ductless AC installation with the remote control.
Costs, Benefits, and Savings of a Ductless System
Understanding the costs and long-term benefits of a ductless AC installation shows why it's a popular choice for Texas homeowners.

A professional ductless AC installation typically ranges from $2,000 to $10,500. Labor alone can cost $500 to $2,000, with complex jobs reaching up to $5,000. Multi-zone systems can cost $10,000 to $20,000. By going the DIY route, you can save thousands on labor.
Total cost is influenced by the number of zones, system brand and efficiency ratings (higher SEER2 units cost more but provide greater savings), and installation complexity.
Pros of Ductless Mini-Splits Cons of Ductless Mini-Splits Highly energy-efficient (up to 35 SEER)Higher initial purchase cost than window units Eliminates ductwork energy loss (up to 30%)Indoor units are visible on walls Zoned heating and cooling for customized comfort Professional installation often recommended Quiet operation (compressor outside)Requires professional handling of refrigerants Easy installation in homes without ductwork Maintenance includes cleaning multiple indoor units Provides both heating and cooling Limited DIY options for complex systems Flexible placement for various room types Aesthetic concerns for some homeowners
Opening up Superior Energy Efficiency
Ductless systems offer superior energy efficiency. According to the Department of Energy, leaky ducts can waste up to 30% of cooling energy. Ductless mini-splits eliminate this waste by delivering conditioned air directly into your rooms.
Most ductless systems achieve SEER2 ratings of 20-35, while traditional central AC systems often max out around 26 SEER. This higher efficiency leads to lower monthly utility bills.
The biggest advantage is zoned climate control. Instead of cooling your entire house, you can target only the spaces you're using. This targeted approach delivers substantial long-term utility savings that help offset the initial investment.
Maximizing Savings: Rebates, Tax Credits, and Timing
You can reduce your ductless AC installation costs with smart planning.
Federal tax credits are often available for high-efficiency HVAC systems. Check current IRS guidelines to see if your chosen system qualifies. Local utility rebates are another great source of savings; contact your utility company to learn about available incentives.
Also, look for manufacturer promotions, which are common during slower sales periods. The best time of year to install is typically spring or fall. HVAC companies have lighter schedules during these off-seasons, which can mean better pricing and more flexible scheduling.
For comprehensive solutions that can maximize your home's efficiency and savings, explore our Improve AC Packages to see how we can help optimize your entire cooling system.
DIY vs. Professional Ductless AC Installation: Making the Right Choice
Deciding between a DIY or professional ductless AC installation is a key consideration. Let's weigh the factors to help you choose the right path for your skills and project.
The Case for DIY Installation
For many homeowners, a ductless AC installation can be a rewarding weekend project.
Cost savings on labor is the biggest motivator. With professional labor costing $500 to $2,000 or more, doing it yourself offers substantial savings. Most DIY mini-split systems cost between $700 and $2,000 for the equipment.
Beyond savings, there's a sense of accomplishment and flexibility in scheduling your project. Modern DIY systems have made this more accessible with pre-charged, no-vac systems that feature quick-connect fittings. This eliminates the need for specialized tools and EPA 608 certification to handle refrigerants.
Simple single-zone setups are especially well-suited for DIY installation, particularly for cooling a single room, a home addition, or a converted garage.
When to Call a Professional for your ductless AC installation
However, some situations require professional expertise for your ductless AC installation.
Electrical work complexity is a major factor. If your home's electrical panel needs upgrading or you are not comfortable working with high-voltage connections, you must call a licensed electrician for your safety.
Handling refrigerant also requires professional skill. If your system is not pre-charged or the lines need modification, you are entering territory that requires EPA 608 certification for safe and legal handling.
Check your warranty requirements, as some manufacturers void warranties if the system isn't installed by a licensed HVAC professional. Multi-zone system complexity can also be overwhelming for a DIY project, as it involves more intricate wiring and refrigerant line work.
Finally, a professional ensures optimal performance and longevity. An experienced technician brings expertise in proper sizing, precise installation, and code compliance, preventing issues that could lead to higher energy bills, frequent repairs, and a shorter system lifespan.
For complex HVAC installations throughout Texas, our experienced team at AC Superheroes TX provides the expertise and precision you need. Learn more about our comprehensive HVAC Installation Services in Austin, TX.
The bottom line: if you're handy, comfortable with basic electrical work, and installing a simple pre-charged system, DIY may be a great option. When in doubt, calling a professional can save you time, stress, and costly mistakes.
Frequently Asked Questions about Ductless Mini-Splits
Here are answers to the most common questions we receive about ductless AC installation projects.
What maintenance does a ductless mini-split require?
Ductless mini-splits are relatively low-maintenance. The most important task is cleaning the reusable air filters in your indoor units every few weeks. Simply remove them, vacuum or rinse them with water, let them dry, and slide them back in.
Periodically wipe down the indoor units to prevent dust buildup. Outside, ensure your outdoor condenser stays clear of debris like leaves and grass clippings. We also recommend an annual professional inspection. A technician will check refrigerant levels, inspect connections, clean coils, and identify small issues before they become major problems, extending your system's life.
If you notice unusual drainage issues, our guide on Why AC System Creates Excessive Condensation can help you understand the cause.
What is the typical lifespan of a ductless system?
A well-maintained mini-split system from a quality ductless AC installation can last 15 to 20 years, a lifespan comparable to or longer than many traditional central air systems.
Several factors influence longevity. Regular maintenance, including filter cleaning and annual tune-ups, is the most significant. Usage habits and climate conditions also play a role, though modern units are built to handle Texas heat.
The quality of the initial installation is foundational. A professionally installed system operates correctly from the start, reducing strain and preventing long-term problems.
Can I control my mini-split with a smart thermostat?
Yes, many modern ductless systems are compatible with smart thermostats and home automation. When shopping for a new system, look for Wi-Fi enabled models that connect to a smartphone app. This allows you to adjust temperatures, set schedules, and monitor energy use from anywhere.
If your current mini-split lacks built-in Wi-Fi, smart controllers and adapters (like Cielo Breez or Sensibo Sky) can add this functionality. These devices learn your remote's signals and connect to your Wi-Fi network.
Once connected, you can integrate your mini-split with home automation systems like Amazon Alexa or Google Assistant for voice control. Smart control offers both convenience and improved efficiency, helping you optimize energy usage. Learn more about these solutions on our Smart Thermostat page.
Conclusion
You now have the essential information to make an informed decision about your home cooling needs and ductless AC installation. Mini-split systems are an excellent choice for Texas homeowners, offering up to 30% better efficiency than central air by eliminating energy loss from ductwork.
Zoned cooling means you only condition the spaces you use, leading to significant savings. A DIY installation can cost as little as $700-$2,000, while professional jobs range from $2,000-$10,500 or more.
While modern pre-charged systems make DIY projects more accessible, it's crucial to know your limits. Complex electrical work, refrigerant handling, and multi-zone systems are best left to professionals to ensure safety and performance.
A properly installed mini-split can provide comfort for 15-20 years with regular maintenance. For complex installations or the peace of mind that comes with expert precision, the team at AC Superheroes TX is ready to help. We serve homeowners throughout Austin, Lakeway, Bee Cave, Round Rock, Cedar Park, and Pflugerville.
Ready to transform your home comfort? Whether you choose a DIY project or professional installation, a cooler, more efficient home is within reach.
Schedule Your Professional Ductless AC Installation in Austin, TX Today!
What Our Clients Say
Hear from our satisfied customers about their experiences.
Your Comfort is Our Priority
Experience top-notch AC repair and maintenance services tailored to your needs. Schedule your service today!
